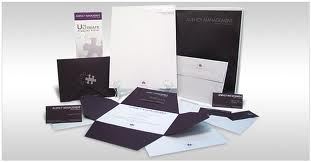
Creating a corporate or business identity package can seem like an overwhelming task, but there’s a way to simplify the process and tackle your design like a seasoned professional. Just ask yourself this question:
“If I could send a tangible version of my company to a customer that explained who we are, what we do, and how we do it, what would the packaging look like?”
Your BRAND IDENTITY STATIONERY should communicate to your customers the overall tone, vision, mission and values of your company. That sounds like a lot to consider, but in reality, once you start evaluating design options, you’ll find it easy to weed out the ones that don’t encompass the look or feel you want your business to be known for.
Here’s how to un-muddy your options and land on the design that will perfectly package your business and showcase it in the best possible light.
STEP 1. Determine Your Needs.
Why are you searching for a new design to implement into a corporate identity package, what do you hope to gain from it, and what printed materials does your design need to work for? Logos look very different on business cards than they do when printed as watermarks on LETTERHEAD, so it’s important to design something that will meet all your stationery needs. Defining your needs before designing for your package will eliminate the risk of wasted time and money down the road.
STEP 2. Start Designing.
Whether your GRAPHIC DESIGN department is doing the work for you, or if the creative control is exercised entirely by your own hands, the process all starts with an idea. Take a few minutes each day to sketch a potential design until you have 10 or more to mull over. Don’t worry about making them perfect yet; we’ll worry about that later.
STEP 3. Slowly Separate the Good Mock-ups from the Bad.
Your sorting efforts will break down your ideas into a pile of “maybes” that includes design elements you liked, but may not be completely sold on. Even if you can’t rule out any one design completely, sorting will at least help you eliminate the portions you don’t particularly love.
STEP 4. Begin Circling or Highlighting the Pieces, Ideas &/or Concepts You Love in Your "Maybe" Pile.
A simple line or curve on one logo design may stick out to you in one mock-up, while the font used in another may speak more to how you want your company perceived by customers.
STEP 5. List the Reasons Why You Like What You've Seen.
You might feel that a particular design communicates the tone of your company’s services or the concerns of your customers better than another. These things are important to identify early on and will help you get the most from your final design.
STEP 6. Separate the Good from the Bad. Again.
You may like three or four options for a logo design, but your instincts will tell you that one is better than the rest. Listen to what your creative impulses are telling you, and weed out as much as possible in your second round of elimination. You’ll give yourself a small but high-quality collection of design pieces to begin working with.
STEP 7. Combine Your Best Design Elements.
Now that you’ve whittled down your mock-ups and combed through for them for the cream of the crop, you’ll be able to incorporate the best parts of your creativity to cull the greatest results. Your business identity package will be sure to dazzle and impress with all your refining.
STEP 8. Ask Yourself Again, "If I Could Send a Tangible Version of My Company to a Customer Who Explained Who We Are, What We Do, and How We Do It, Is that What the Packaging Would Look Like?"
You may find that there are still a few areas that need refining, or you may decide that you’re ready to get your job to a printer. If more revisions are needed, don’t shy away from them. Make sure your finished design is one you’ll be proud to present to customers.
STEP 9. Print Your Perfect New Design on Decided Business Package Materials, & Start Circulating Them.
Your identity package is finally free from the chains of creativity slumps and time-consuming revisions, and now it’s time to celebrate. What better way to celebrate than to give your business printer the green light and put your new materials to use?
Getting through these eight steps can take a little time, so be sure to allow yourself the time to exercise each one in detail. By taking your time and refining your vision, you’ll end up with a product you're proud to put in the hands of your customers and stakeholders.
